If you don't feel comfortable performing this yourself then ask for help.
I have been contacted by several dealers as well as owners pertaining to chatter on engagement of the clutches.
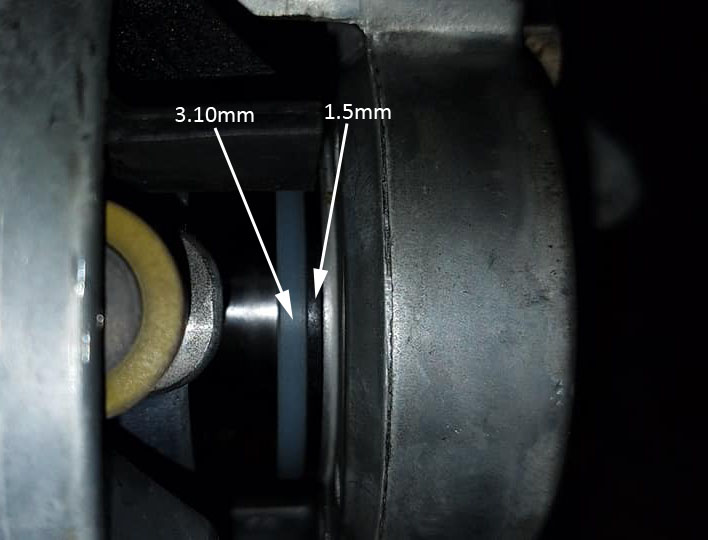
This has gotten worse in the newer models due to a change that was made on the secondary (driven) clutch. The older style 800 clutches had one creme color thermoplastic shim (3.10mm) that separates the two secondary sheaves when at idle or with engine off.
The newer design now has in addition to the creme color shim (3.10mm) a black shim (1.5mm) which equates to a stack thickness of (4.6mm) roughly.
Odes has also switched to the Stage 4 1000 belt from CV Tech on the 800's as well and I have mixed feelings on that.
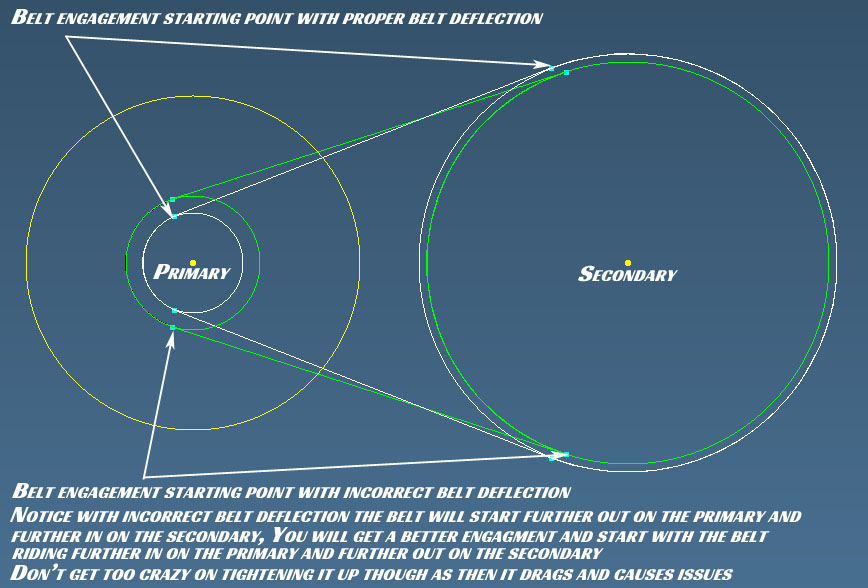
I know from experience with many of you I have found that the thicker shim stack allows too much belt deflection and changes the ratio when starting out since the belt is sucked down into the Secondary (driven) clutch it will ride further out on the Primary (drive) clutch on engagement.
I am sure some of you have driven a manual transmission vehicle and started out in the wrong gear before and it feels pretty much like that.
So the goal here is to reduce belt deflection and that can be accomplished a couple different ways, If you or someone you know has a metal lathe you can have them face off the creme color shim to (2.5mm) thickness and put ONLY that shim back in and leave the black shim out if it came with it.
Just purchase shims with a 35mm ID / 45mm OD in a thickness of 0.5mm and 1.0mm and place the 0.5mm thick shim between two 1.0mm shims with the rounded edge of the 1.0mm shim out on both sides.
What this will do is bring the Secondary (driven) sheaves closer together and make the belt ride higher on the Secondary (driven) clutch creating a lower (higher numerical) gear ratio.
Remember the days of changing from say a 3.73 to 4.10 rear end ratio and the ease which it pulled and started out with.
This will also allow you to run aftermarket belts w/o issue such as my favorite the Ultimax UXP446, or Dayco XTX2236, Gates 30C3750 as well as others.
Keep in mind IF there are direction arrows on the belt install them with the arrows pointing in the direction of rotation, If no arrows then the belt is NOT directional but if ever removed remember to install it EXACTLY like you removed it.
I install all the belts so you can read the lettering from standing at side of machine looking at it. Now if you tend to read upside down feel free to install it upside down lettering.
I am adding some images below so you can see the location of the shims as well as get a idea on what it takes to dis-assemble the Secondary (driven) clutch.
(1) Remove clutch from gearbox shaft, Bolt head size can be either 16mm or 17mm as I have seen both. The bolt is R/H thread so the lefty loosey policy applies here. They can be tight if never uninstalled as some have loctite on them from the factory.
(2) Make sure there are alignment marks on the outer edge of the driven sheaves, If they are not there use a felt pen or something that will not wipe off and mark them so they will be clocked correctly on re-assembly.
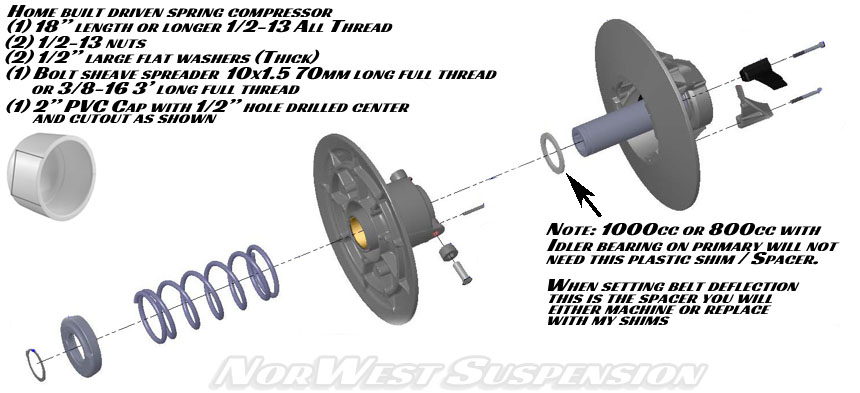
(3) Using the materials you purchased from the hardware store place the all thread through the center using the washers and nuts and with the cap it will resemble this spring compressor tool.
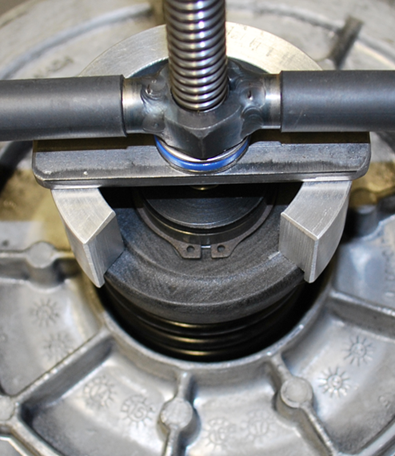
(4) Tighten the nuts on the all thread until you push the spring retainer down and have some clearance between the spring retainer and snap ring as shown by the arrow.
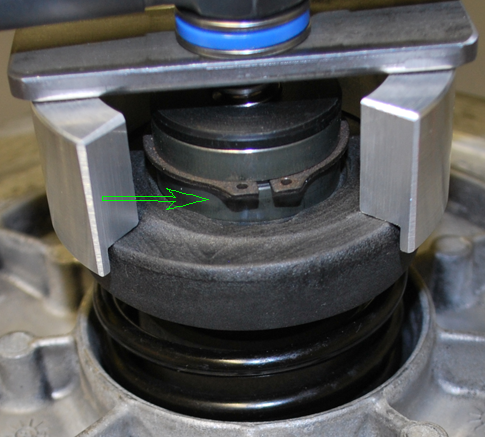
(5) Remove the snap ring and take note there is a rounded edge to the snap ring as well as a sharp flat edge, The flat sharp edge will always face up or out whatever you want to call it. Back off the nuts and remove the spring and set aside the snap ring, spring seat, spring.
(6) Flip the driven clutch over and take a roll of masking tape or duct tape and set it on the work bench and put the shaft of the driven on the center of the roll of tape to support the driven for disassembly.
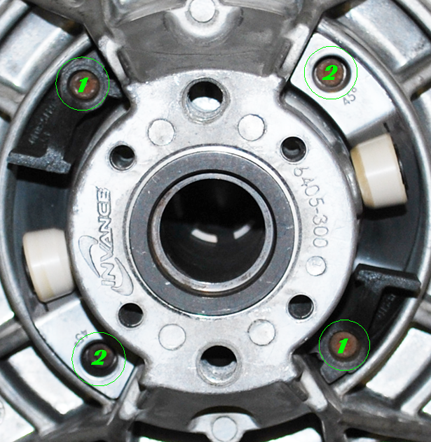
You will need a 3mm hex wrench to remove the bolts holding on the ramps. Remove bolts #1 first and #2 second and then on re-assembly install #2 first and then #1. Use a drop or two of medium strength thread locker on the ramp bolts on re-assembly.
(7) This shows the location of the oem plastic spacer on the Odes 800 machines that have not been upgraded to the 1000 primary clutch. The oem plastic spacer will sit at the bottom with the clutch facing you as shown and it will be where the green arrow is. If retaining the oem 800 primary clutch you would REMOVE these plastic spacer(s) and install the (3) or (4) shims that I sent with the kit. Do NOT reinstall the plastic spacer(s).
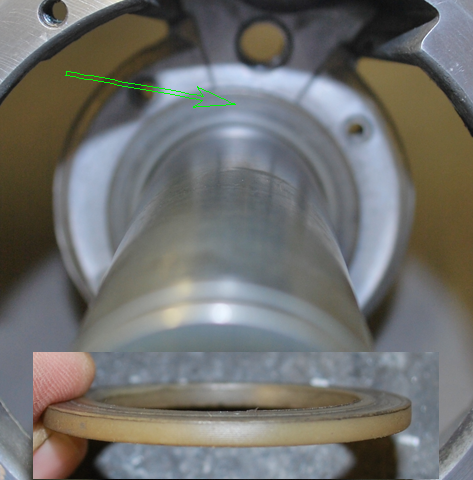
(7a) Seems Odes decided to add a black plastic shim as well as the creme shim, So if you have both a translucent shim as shown as well as a black one remove BOTH and set them aside as neither will be re-installed if installing the 2.5mm shim pack.
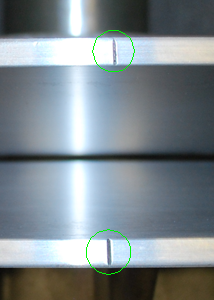
Drawing I made to show the different positions with correct belt deflection and too much belt deflection, This is not to scale. Just gives an idea the why behind what it is doing.
Exploded view of Secondary (driven) and list of hardware store items to build spring compressor for CV Tech Invance LV.
Links to shims from McMaster Carr
.5mm thick shim
1mm thick shim