I tried to go step by step and show you each step plus a couple extras at the bottom in reference to the proper way to install the shims and the snap ring.
If you see something I am missing then by all means shoot me a private message here or a message on FB in any of the odes groups.
(1) Mark the timing marks before dis-assembly so the sheaves go back together in the proper orientation.
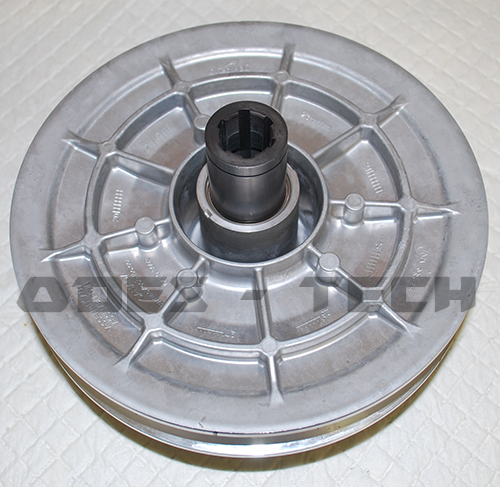
(2) Image of the fixed sheave side of the secondary.

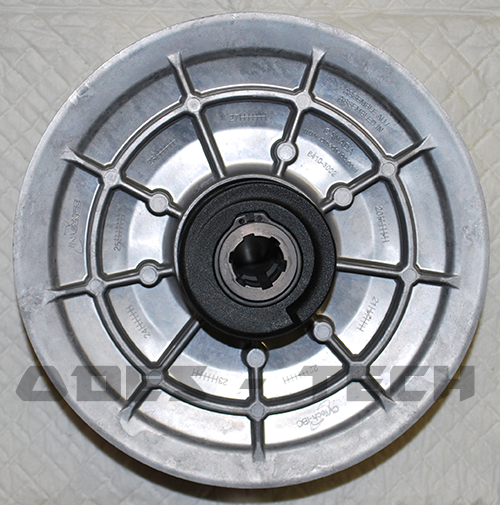
(3) Image of the movable sheave side of the secondary.
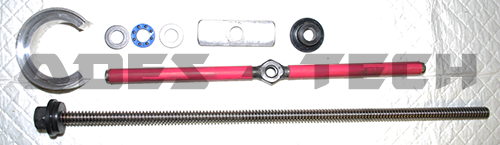
(4) This is the spring compressor tool I made and if you are a shop you may want to consider using Acme all-thread rod as it is faster then a normal threaded rod.
The all-thread you see here is Acme with a roller thrust so one finger and you can compress any spring.
If you are on a budget and want availability just get some 1/2" all thread and some nuts and washers as well as a 2" pvc cap with a 1/2" hole drilled center as well as a window cut out and it works very well.
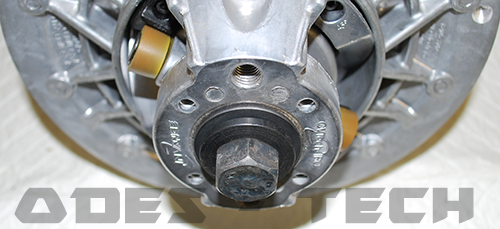
(5) All thread run through the shaft from the fixed sheave side.
(6) Compression sleeve slipped over spring seat.
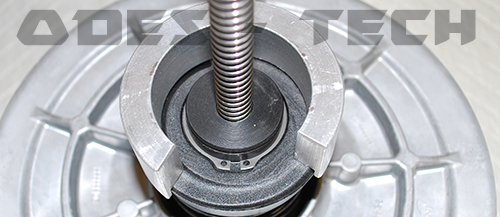
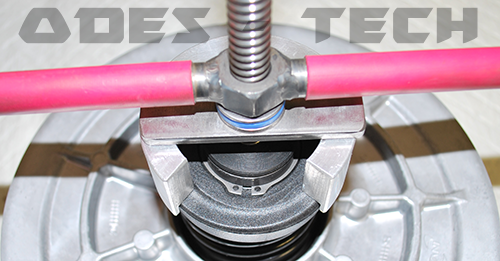
(7) Bar and thrust bearing as well as handle threaded down to compress spring seat.
After compression of spring seat remove snap ring using snap rings pliers.
(8) Once snap ring has been removed back off the nut or if you have a handle arrangement back it off until all pressure is released from spring.
Remove snap ring and set aside.
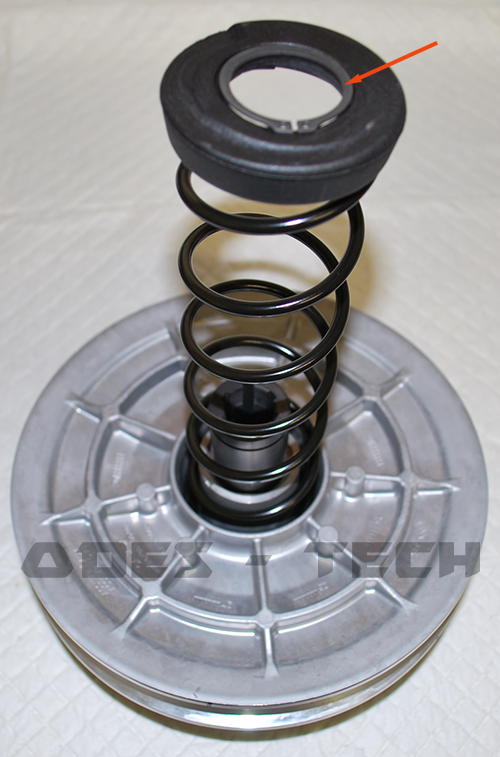
(9) Remove spring seat and set aside.
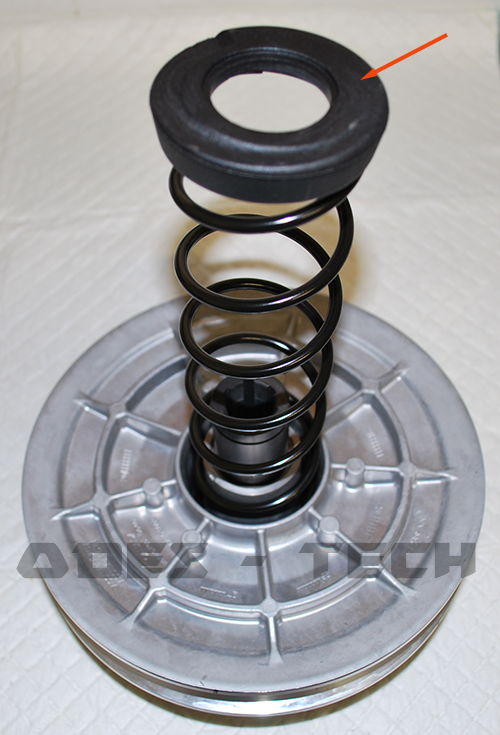
(10) Remove spring and set aside.
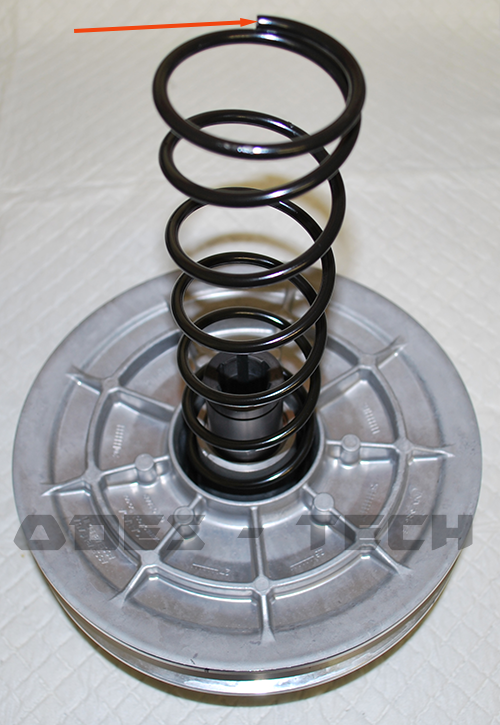
(11) After everything is removed and ready to flip over to remove ramps and helix's.
(12) Yep that is a roll of duct tape and just set it on the bench and flip clutch and set the side you were just working on in there and that will hold the clutch partially open so easy to rotate.

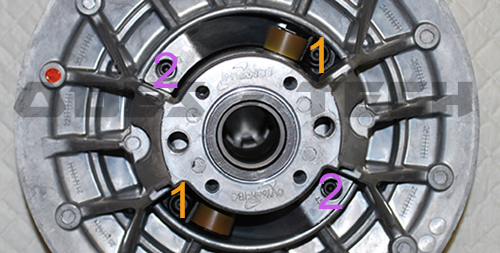
(13) Movable sheave side in roll of duct tape.
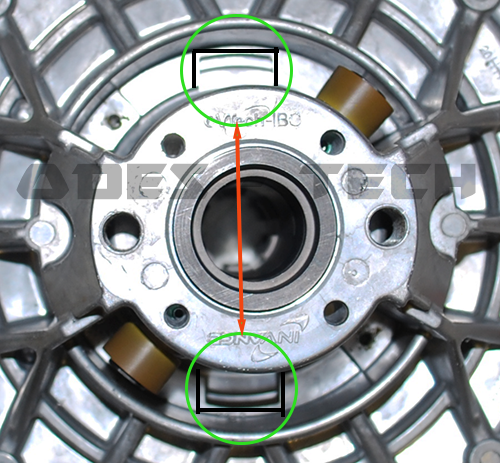
(13a) Using a 3mm allen socket remove the fasteners marked 1 first and then 2 and on assembly insert 2 first and then 1.
Use a touch a blue loctite on those little fasteners they don't need to be ham fisted, Just good and snug.
(14) Align the 2 rollers with the 2 slots and pull the two apart.
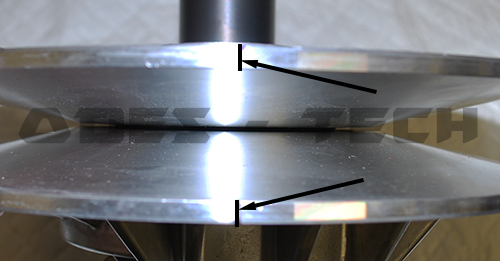
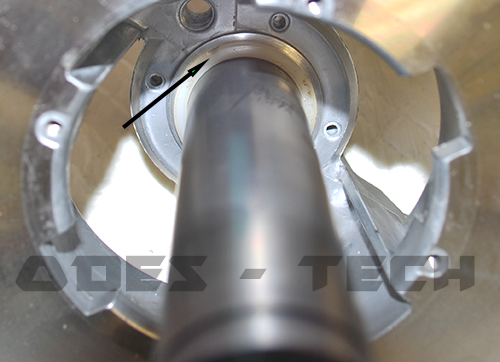
(15) IF you have a 800 or a Pathcross you will see this shim in there and that can be pulled out and set aside.
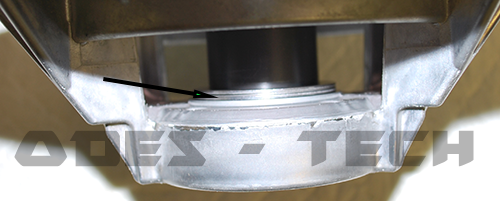
(16) You can refer to my post Here about shimming the 800 secondary to get rid of a few issues and the shims installed will look like this.
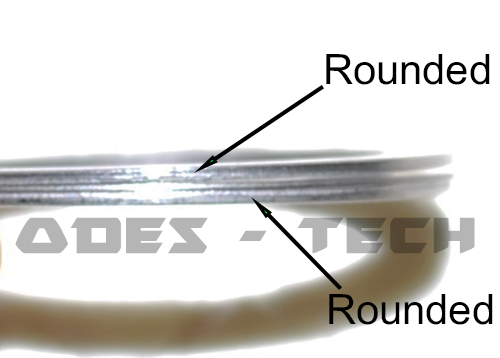
(17) The proper way to install the shims is a 1mm shim rounded edge out then a .5mm shim center and then another 1mm shim rounded edge out.
Rounded edges are always facing out on the outside shims.
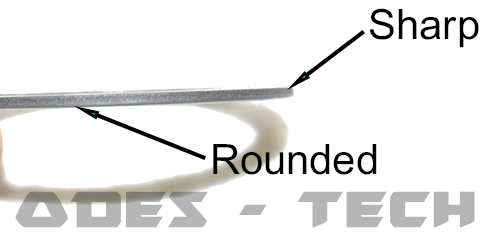
(18) Yes there is a right and wrong way to install a snap ring, Notice the rounded edge and the sharp edge.
The sharp is always installed to the outside of the part it is trying to retain.
(19) Just showing the pocket and pigtail stop in the spring seat where the pigtail of the spring will sit and be retained to prevent turning.
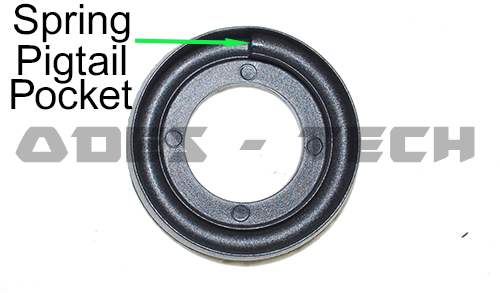
(20) Just showing the pigtail of the spring that goes in that pocket.