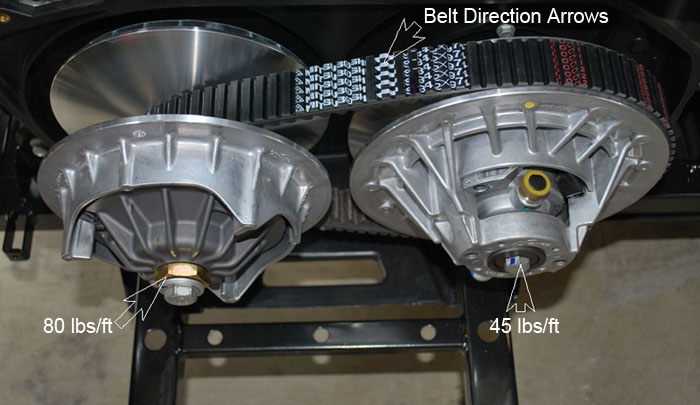
Everything intact here and torque spec on primary is for both main bolt & cover nut (30mm or 32mm) are the hex sizes for the cover nut. Some belts have no direction arrows and some do so if you see them install the belt that direction or if no arrows install the belt so you can read it from outside and it is not upside down.
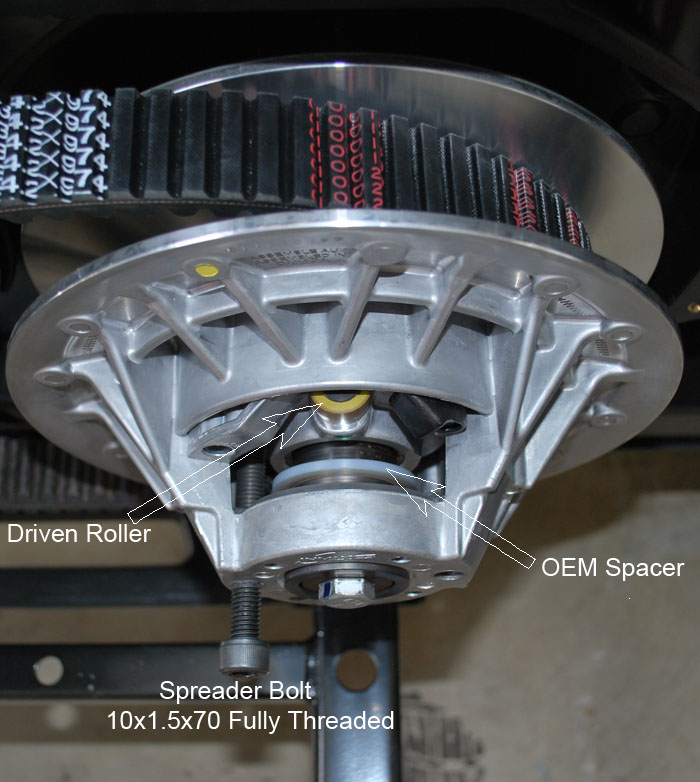
Showing the driven and the oem plastic shim on the Pathcross and 800 UTV models as well as the correct bolt to spread the sheaves, I have seen this a few times before where people will complain of the driven breaking or cracking and splits apart, That issue is coming from being to ham fisted on running the spreader bolt in.
This is not a competition just run it in far enough to get the belt off and that is it.
Showing timing marks on the primary as most do not realign them, For balance purposes as well as keeping things sliding well make sure you check the marks BEFORE disassembly as if they don't have them you should be marking the clutch to make sure it is re-assembled as it was.

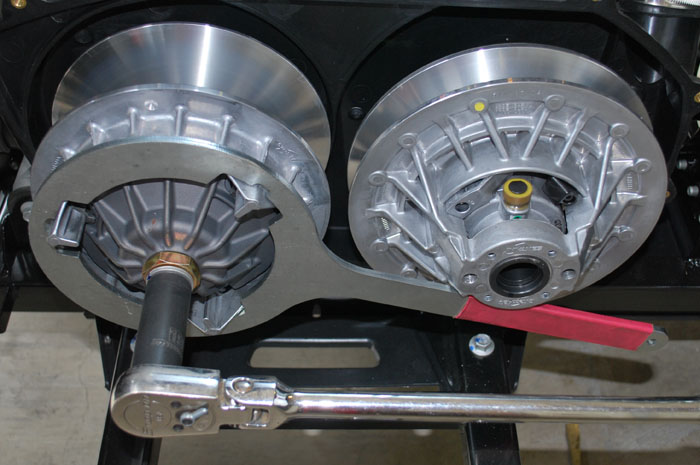
Just showing the correct tool to hold the primary clutch while the bolt and nut are either being removed or installed and torqued. Main bolt being removed here.
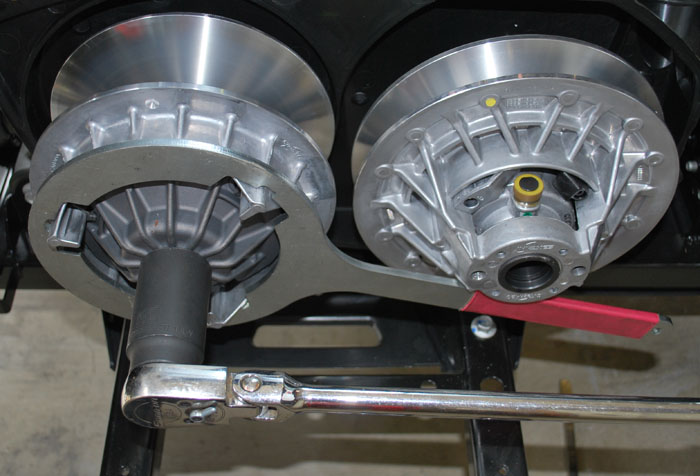
Just showing the correct tool to hold the primary clutch while the bolt and nut are either being removed or installed and torqued. Cover nut being removed here.
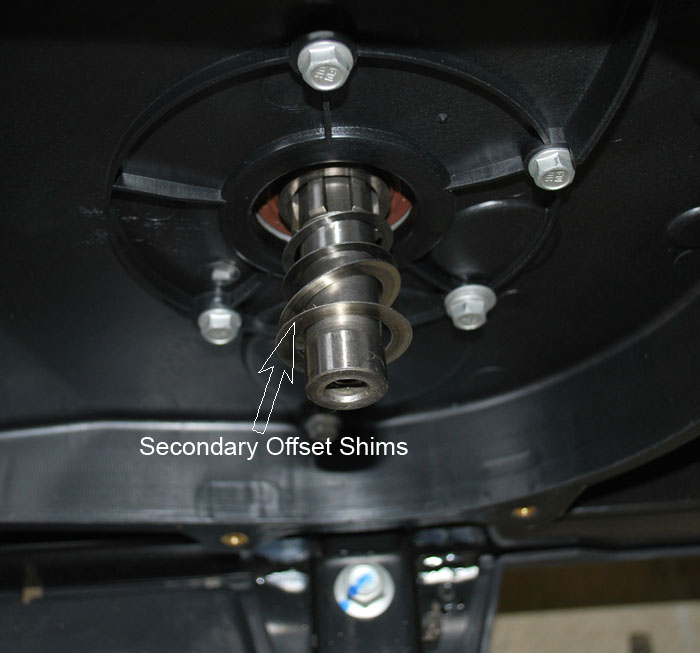
Secondary offset shims, Purpose is to align the belt correctly so you don't have premature belt failure or a poor performing clutch system. These shims are 25mm ID and are available in various thicknesses from industrial supply stores.
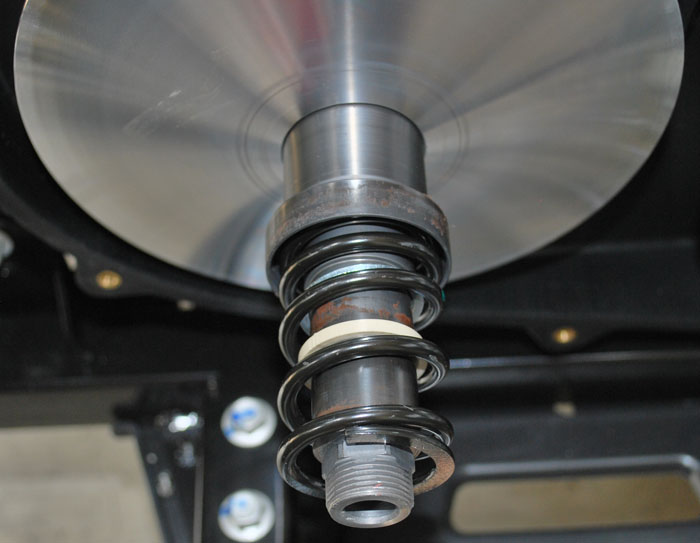
Primary with proper assembly of spring cup or seat, travel limiter steel washer, travel limiter plastic spacer and spring.
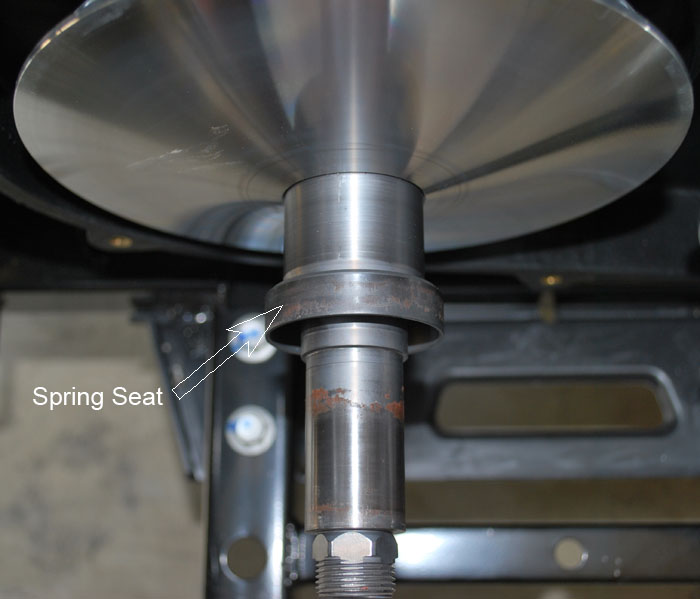
Showing spring seat here and as you can see the bushing of the movable sheave rides on this and slides back and forth. Any dirt or debris that get's inbetween the ID of the bushing and the OD of the spring seat will cause binding.
If you try and start your machine and lurches forward that might be the issue, If you machine stalls when coming to a stop this may be your problem.
This issue is very common in wet areas or muddy areas as the dirt or mud will get in the cvt case and coat the spring seat and bushing and then when you park it, Then it dries out and now you have a stuck primary clutch.
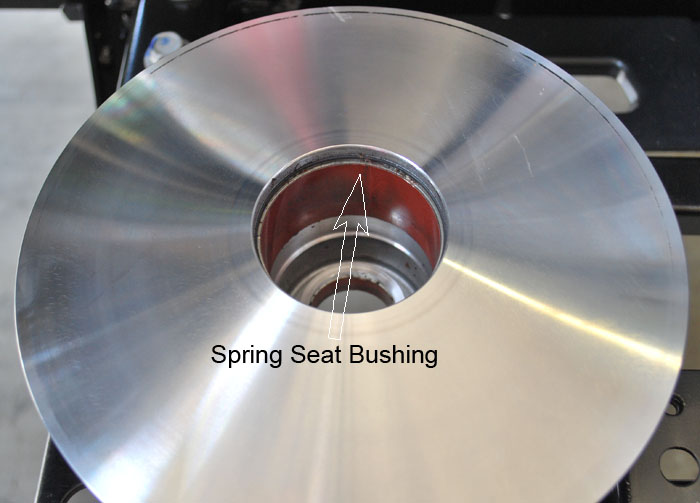
Showing the primary movable sheave bushing and this is the area all the mud and dirt will collect and eventually the movable sheave seizes up and no more go. Check it out and clean it with hot soapy water and then dry off.
Showing the proper orientation of the weight blocs and general view of the ramps side of the cover.

Alignment:
Once all the checking and replacing parts in the clutches the final step will to make sure they are aligned properly.
This is a very important step as it makes sure the belt is aligned and will reduce heat and wear from being out of alignment.
To change the alignment you will add or subtract shims between the driven and the gearbox, If you need to move closer to the fixed sheave then subtract shims if you need to pull away from the fixed sheave then add shims.
All 3 points of the alignment bar should be touching at the 3 locations marked with red lines and circled in white.
So you know the offset of that bar I am using there is 34mm.

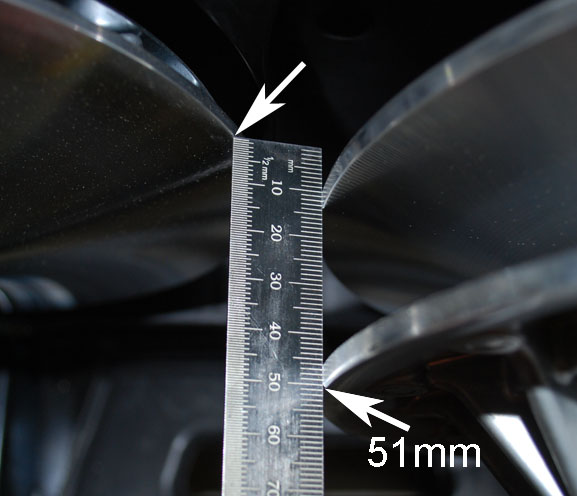
For those that don't have any clutch alignment bar here is a tape measure approach that will work.
Shims for offset:
.5mm Thick
1.0mm Thick